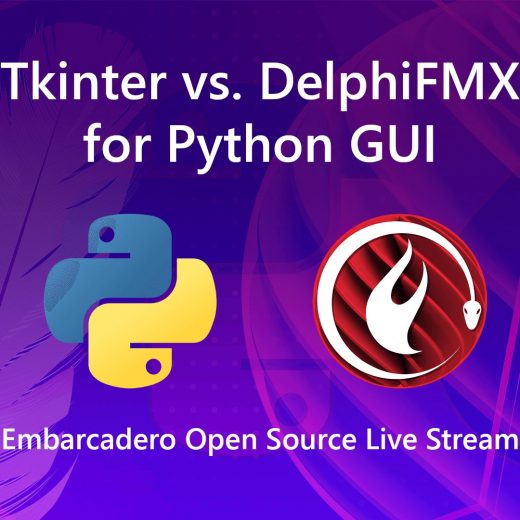
Tkinter vs DelphiFMX în fluxul Embarcadero Open Source
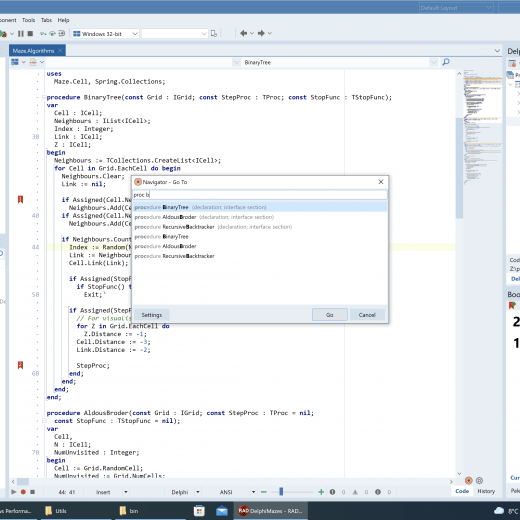
Începem ceva nou și sunt destul de încântat de asta. Acesta este primul dintr-o serie de fluxuri live regulate care discută cele mai recente proiecte open source. Ambele proiecte sponsorizate de Embarcadero și proiecte cheie din comunitate. Voi fi gazda și mi se vor alătura membri ai comunității, dezvoltatori implicați în aceste proiecte open source, precum și membri ai Embarcadero și Idera’s Product Management. Primul nostru flux, săptămâna viitoare, este axat pe Tkinter vs DelphiFMX pentru dezvoltarea GUI Python, deci vizează în mod direct dezvoltatorul Python. Joi, 2 iunie 2022 la 10:00 CDT (Reveniți la această postare după webinar pentru link-uri, diapozitive și reluare.) Aceste fluxuri servesc mai multe scopuri: Colaborați pentru mine cu alți manageri de proiect de la Embarcadero și Idera pentru a modela foaia de parcurs și modul în care sprijinim aceste proiecte Distribuiți conversațiile din culise cu comunitatea acestor conversații Modelați în colaborare viitorul acestor proiecte open source Actualizări regulate pentru noutățile acestor proiecte și ale comunității Scopul este să se rotească prin proiecte în fiecare săptămână și să includă o temă în proiect. De exemplu, săptămâna aceasta discutăm despre biblioteca GUI DelphiFMX pentru Python și o comparăm cu Tkinter, biblioteca existentă de facto GUI Python. Aceasta este o oportunitate bună de a vedea lacune în care DelphiFMX se poate îmbunătăți, în timp ce vedem ce face DelphiFMX pentru a îmbunătăți viața dezvoltatorului Python. Vorbind despre dezvoltarea GUI Python, avem o nouă . Ne vom uita, de asemenea, la unele dintre proiectele conexe pentru Python: Agenda pentru flux: Tkinter vs. DelphiFMX Prezentare generală și comparare a celor două biblioteci Unde se poate îmbunătăți DelphiFMX? Ce este nou în DelphiFMX Probleme de revizuire și solicitări de tragere Răspundeți la întrebări Alți feedback sau colaboratori Planificați o foaie de parcurs pentru schimbările viitoare Fluxurile viitoare vor acoperi alte proiecte din ecosistemul nostru Python, proiecte non-Python și chiar proiecte comunitare pe care le iubim! Aceasta este cea mai recentă hartă a ecosistemului tău Python. L-am împărțit în două părți, jumătatea de sus este proiecte pentru dezvoltatorii Python și este punctul central al fluxului pe 2 iunie. Planificăm pe 9 iunie să ne concentrăm asupra proiectelor pentru dezvoltatorii Delphi care includ biblioteci Python pentru o dezvoltare simplă bazată pe Open Pascal. Sunt foarte încântat să arăt la ce lucrăm acolo. Iată o listă cu alte biblioteci open source pe care le putem discuta în fluxurile viitoare: SonarDelphi Pluginul Sonar-Delphi folosit pentru a analiza proiecte Delphi cu SonarQube Bold pentru Delphi – O arhitectură de driver de model (și bibliotecă ORM) pentru Delphi Dev-C++ – Un IDE C/C++ rapid, portabil, simplu și gratuit Jocuri arcade C++ – 4 jocuri arcade dezvoltate în C++Builder cu FireMonkey pentru Windows, macOS, iOS și Android DelphiArcadeGames – 4 jocuri arcade dezvoltate în Delphi cu FireMonkey pentru Windows, macOS, iOS și Android DelphiBigNumbers – Numere întregi și cu virgulă mobilă foarte mari în Delphi Kastri – Biblioteca Delphi de uz general skia4delphi – Bibliotecă GUI 2D pentru VCL și FireMonkey Hashload Boss – Manager de dependențe pentru Delphi și Lazarus Și deschis la sugestiile comunității Ca parte a fluxului live, voi împărtăși documente mai detaliate despre proiect, dar iată câteva statistici ca o previzualizare. Sper să ne vedem online pentru seminariul web de joi, 2 iunie 2022, la ora 10:00 CDT .