From the blog

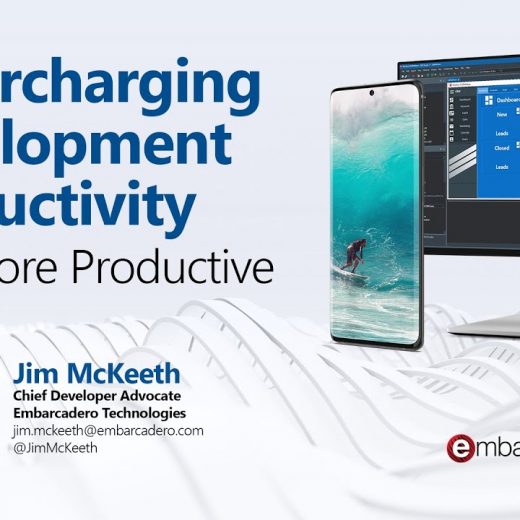
How to Supercharge Your Windows App Development Productivity

Whether you are working on a small software or a huge windows app development project, the process can be tedious, and it will surely consume lots of your time. Interestingly, there are many possible ways developers can do to boost their productivity. In this video, Jim McKeeth will share every possible tip and trick to supercharge your development productivity. With the help of some Embarcadero MVPs, Jim managed to compile the ultimate guide to effectively boost your productivity in developing software. The tips and tricks to supercharge your productivity One of the core tips shared by McKeeth in this webinar is to use Delphi above any other programming languages. Delphi is designed to provide an easy-to-use and easy-to-learn development environment allowing you to get things done quicker. He also encouraged developers to practice those simple yet often overlooked coding techniques to complete their work relatively faster. These include those keyboard shortcuts and other surprisingly effective tips from Alister Christie (Code Faster in Delphi). He also encouraged developers to utilize the use of component libraries because it is far more productive, safer, and faster to use those thoroughly rested libraries than using their own code. David Cornelius also suggested establishing an Environment consistency when coding while Bruce McGee encouraged automating builds using MSBuild. Embarcadero MVPs like Ian Barker encouraged the use of the so-called Pomodoro Technique to help you focus your efforts on timed chunks of work. Dalija Prasnikar, on the other hand, came up with her own list suggesting that a developer should learn how to reduce distractions and focus on work they know they can do at a given moment. Aside from the aforementioned techniques, the webinar will also share notable software and frameworks that you can use to supercharge your development productivity. These include the use of PyScripter, UltraEdit, and frameworks like Router4D, Safety4D, Bind4D, Simple ORM, Typora, IDE Visualizers, and Delphi Parser, Invoke, Everything (fast engine to search over your drives), HTTPie, and more. Feel free to watch the webinar below to learn more.   

Read More

How to deploy Shopify themes with GitLab

1.75 million sellers are using Shopify’s eCommerce platform, and every one of these online stores has a codebase that lives somewhere. You may have encountered some challenges while scaling your development efforts at your organization while working within Shopify. Setting up a process for repeatable deployments with GitLab can keep everything streamlined and safe. No one wants something going live in production before it’s ready. Here’s a simple development flow you are going to be able to replicate using GitLab CI/CD pipelines for Shopify theme deployments. Develop locally on a feature branch until you are happy with your local changes Merge your feature branch into your main branch → This will update the staging theme in Shopify When everything is ready to go live, create a new tag and push it to GitLab → The live theme will be updated automatically 🎉 This tutorial assumes you have set up a repository in a GitLab project. 1. Add your variables For security purposes, you don’t want to store your credentials for your Shopify site in your configuration file. You can use variables in GitLab to handle that. Use the ThemeKit CLI to retrieve all the available theme IDs from your Shopify store by entering this into your command line: theme get –list -p=[shopify-api-access-token] -s=[your-store.myshopify.com] Help: Generate API credentials in Shopify Open your project in GitLab, navigate to /settings/ci_cd, and open the variables section. Add four unique variables with their corresponding keys and values Key Value STAGING_THEME_ID [staging-theme-id-number] PRODUCTION_THEME_ID [production-theme-id-number] SHOP_WEB_ADDRESS [your-store.myshopify.com] SHOPIFY_API_ACCESS_TOKEN [shopify-api-access-token] Note: A protected variable will not show in the CI logs, which adds an extra layer of security. If you choose to protect your variables, you need to make sure that your main branch and the tag v* wildcard are protected as well. 2. Add a config.yml to your project repository This file may already exist, but config.yml needs to have the following to properly map the variables from step 1 with your Shopify theme for deployments. staging: password: ${SHOPIFY_API_ACCESS_TOKEN} theme_id: ${STAGING_THEME_ID} store: ${SHOP_WEB_ADDRESS} production: password: ${SHOPIFY_API_ACCESS_TOKEN} theme_id: ${PRODUCTION_THEME_ID} store: ${SHOP_WEB_ADDRESS} 3. Add a .gitlab-ci.yml file to your project Now set up your pipeline to run on specific triggers. Go to your local theme folder, create a .gitlab-ci.yml file at the project root, and add the snippet below. This snippet is the configuration for the CI pipeline. image: python:2 stages: – staging – production staging: image: python:2 stage: staging script: – curl -s https://shopify.github.io/themekit/scripts/install.py | python – theme deploy -e=staging only: variables: – $CI_DEFAULT_BRANCH == $CI_COMMIT_BRANCH production: image: python:2 stage: production script: – curl -s https://shopify.github.io/themekit/scripts/install.py | python – theme deploy -e=production –allow-live only: – tags It has two stages: staging and production. Each will install the ThemeKit CLI first and then deploy the repository to the corresponding theme. 4. Now push some changes to deploy Any code pushed to the main branch will set up a deployment to the staging theme in Shopify git commit -am “commit message” git push When you are ready to push changes to production, add a tag and push it. git tag -a “v1.0.0” -m “First release to production from GitLab” git push –tags Alternative option: Create a tag from GitLab That’s it! You’re now using CI to automate deployments from GitLab to your Shopify themes. Further refine this workflow by incorporating […]

Read More

5 Examples Of A Successful JS Grid

JavaScript is everywhere. It is used on millions of websites and isn’t going away anytime soon. This language is no longer restricted to your web browser as it’s also appropriate for server-side apps. When it comes to showing data, the Grid is one of the most fundamental and helpful JavaScript components. It is a common yet essential technology used by developers to display enormous data sets and, more significantly, to allow users to browse, sort, and interact with them. JavaScript Grids are a tool that allows developers to modernize and speed corporate processes by making it easier for their users to work with data. JS Grid enables us to present vast amounts of data without stuttering or freezing. They also help us save a lot of time when it comes to data management. This article will discuss 5 examples of successful JS Grid so that you can understand this tool better. Why are Data Grids Important?   Data grids are required in online applications that display a large amount of data, such as live reports, tracking statistics, etc. The following are some of the reasons why you should use a data grid in your next project: Data grids boost your application’s performance. Because most open source data grid libraries are small and light, they don’t have a lot of overhead. Virtual scrolling is also available in most libraries, improving user experience while scrolling through enormous amounts of material. Filtering, sorting, and pagination are characteristics of data grids that make it easier to navigate enormous databases. What is the Importance of Sencha Ext JS? Sencha Ext JS is a JavaScript framework that is used for creating data-intensive, cross-platform online and mobile applications for all modern devices. This JS framework comes with over 140 high-performance UI components that have been pre-integrated and tested. Ext JS is the most comprehensive collection of high-performance, customizable UI widgets in the industry, including HTML5 grids, lists, menus, panels, toolbars, trees, forms, windows, and more. As previously stated, the focus of this article will be on JS grids. Why is Ext JS Grid the Best in the Market? The Ext JS grid is an extremely useful component with its comprehensive functionality and many extensions. It simplifies app design since it does not rely on third-party libraries. Built-in Ext JS UI components like dropdown menus, grouping data, and other fascinating add-on functionalities also assist with data organization. In Ext JS, the grid uses buffered grid rendering. Users can use this option to browse thousands of data points without incurring the performance penalties of bringing them all into the DOM at once. Column locking is another handy feature of Ext JS. You can enable automatic locking by setting the column’s ‘locked’ settings to ‘true’ or by setting ‘enable locking’ to ‘true.’ Furthermore, programmers can embed components inside grid cells in Ext JS using the WidgetColumn class. For adding a Widget Column to your page, you simply have to set the xtype of the column to “widgetcolumn.” Ext has several helpful plugins. For instance, the Row Expander plugin adds an “expander” column to each row, allowing the user to reveal or hide the body of the row. Because users can minimize, increase, or hide columns based on their needs, this feature is critical. Another advantage of this feature is that […]

Read More

A Beginner’s Guide To The Best Low Code Platform

What is the Low-Code, No-Code Movement? As a programmer/developer or an engineer it’s not long now before you will see advertising and articles about no-code or low code development technologies or micro-services available in the market. A quick web search for “low-code development tools” and you will discover hundreds of different micro-tools that can help you build a whole store web app or any other e-commerce platform by connecting and integrating dozens of different micro-tools. But which is the best low code platform? In this article, you can find mature and stable technologies offering a low-code development platform yet still allowing you, the developer, 100% control of every aspect of the finished app and access to the full source code which you can customize – if you wish – in any way you want Are all low-code development platforms the same? Very definitely not. If you have been programming in a complex way and enjoying and suddenly someone says “hey, I can create a complete e-commerce store web app without writing any lines of code” then it feels a little like they are not a ‘genuine’ software developer. Developers write code, don’t they? Lots and lots of code. But when you think of it from the general point of view, they are developers, precisely non-coding developers. They solve problems and automate the job with pre-built micro-services.  Does this mean that this automated no-code solution will make developers who actually write code obsolete? Well, no. Lots of the no-code solutions out there offer what is in effect the customization of a set of standard features in a ready-made app. The apps stay within an online walled garden and, typically, the developer has no access to the source code and must pay a monthly fee to keep the app active and working. As soon as you stop paying your fee the app ceases to work. With those kind of solutions the developer never has access to any code at all or if they do it’s generally only a ‘slug’ or area in which to type in custom code. The paradigm is for you NOT to have the full source code, ever. In fact these kind of online behemoths are actually so heavily dependent on the cloud-based microservices they use to enable the app’s functionality that they couldn’t provide the developer with source code even if it was decided that this was a good idea. It’s not only part of their business model, it’s actually not even feasible. There are better solutions which give the control of the apps back to you and yet still offer a low-code/no-code way of creating software applications. The best solution is one which leverages online services and low-code solutions while retaining full control at the developer level. Why do low-code tools matter? If you want your product to be in the market as soon as possible, trying ready-baked cloud services could be a great choice rather than building everything from scratch. For instance, APILayer provides dozens of different neatly packaged services that you can easily integrate into your platform to handle Or you can look at components like CData with FireDAC. CData is a low-code data integration component set. You can quickly build applications that read and write live data from popular on-premises and cloud data sources with RAD Studio. Take […]

Read More

Enter the Boss Room in 2022: Netcode for GameObjects, Relay, and Lobby

Boss Room is a multiplayer game, and as such, having a way to discover and join games is essential. Today, we have two options for players to find each-other and to connect to the game. The direct IP connection allows the users to connect to each other through their publicly exposed IP address. However, connecting to someone else’s computer is often not as straightforward as one would think due to computers being hidden behind NATs (network address translation devices) and routers.  Port forwarding can make it possible to create a connection, but it would still require the host to do extra work in order for other players to be able to connect. This solution also does nothing to facilitate game session discovery – players have to share the join information through out-of-game means. The upside is that this connection mode does not require internet connection and works in LAN environments.  However, Boss Room is a multiplayer experience that is meant to be also playable over the internet, with sessions that are easily discoverable and that don’t force the host players to perform port forwarding. This is where Unity Gaming Services come into play – a combination of Authentication, Lobby, and Relay is what allows us to make it easy for players to host and join games that are playable over the internet, without the need for port forwarding or out-of-game coordination. After integrating Authentication, Lobby, and Relay services into Boss Room, it became simpler to host and join games, cutting down on the need to do port forwarding and sharing the information needed to join a game externally.  Overall, it’s now a much smoother and quicker experience, which is nice in a sample and essential in a production game. Now let’s take a look at some of the learnings that we had!

Read More

What’s new in DataSpell 2022.1

News Releases JupyterHub 2.0 support, the ability to copy files to remote Jupyter servers, runtime completion, and the DataSpell Onboarding Tour It’s been quite a while since we released the first public version of DataSpell back in November 2021. We’ve received a lot of feedback since then and are doing our best to address it with new features and fixes coming with the new DataSpell 2022.1 release. Improvements to the way DataSpell interacts with remote Jupyter servers brought the inclusion of JupyterHub 2.0 support, as well as the ability to copy files from the local machine to remote Jupyter right in the workspace. Both local and remote Jupyter notebooks now handle kernel restart requests better. Further support for notebook cell manipulations with fixes for cell output copy-pasting and group cell manipulations like code to markdown cell conversions have been added. Writing code in Jupyter is now enhanced by the completion provided by Jupyter runtime and the superclasses extraction action Python script users are familiar with. Cell outputs received a number of fixes, making work with interactive tables smoother. Interactive graphics like Plotly and Bokeh now use the same theme as the IDE does, making it visually appealing for those who use dark themes. Last but not least: if you’ve never tried DataSpell and are wondering how its Jupyter notebooks’ features look, or just want a quick recap, it’s now easier than ever with the Onboarding Tour embedded right in the IDE. Go through the detailed feature descriptions below, give the new release a try, and share your feedback and feature requests with us via our issue tracker and Slack! Download DataSpell 2022.1 Remote Jupyter support Over the past few years, usage of remote servers for computation and data storage has increased throughout the industry – the fields of data analysis and machine learning are no exception. Network accessible Jupyter servers allow access to shared data and computational resources, providing the ability to collaborate with your teammates. To ensure you can adopt this trend, the new DataSpell release brings improvements for your remote Jupyter workflows. Support for JupyterHub 2.0 JupyterHub, a platform that provides multi-user access to remote Jupyter servers, has received a major upgrade with version 2.0, which introduced roles and scopes. DataSpell 2022.1 has adopted the API changes of the new version and allows connections to JupyterHub 2.0 by URL; the same way connections work for Jupyter and JupyterHub 1.0 servers. Choose File | Add Jupyter connection…, paste the JupyterHub server URL, and work with Jupyter notebooks right from DataSpell. Copying files to and from remote Jupyter servers With DataSpell 2022.1, you can copy local files to a remote Jupyter instance and vice versa. You can also copy them between two remote Jupyter instances. This simplifies the exchange of data and notebooks, and it helps you keep your projects in sync. You can use the context menu or keyboard shortcuts to copy and paste files. Outputs The ability to readily explore computation results is one of the cornerstones of interactive programming with Jupyter. Our goal is to make cell outputs as easy to manipulate as the source code chunks, and provide interactivity and visual appeal at the same time. Cell output copy-pasting Cell outputs are now copy-pasted along with the cell sources. This feature, in addition to a number […]

Read More

Introducing PyCharm 2022.1!

News Releases In this first release of 2022, we decided to focus on polishing existing features and workflows instead of adding new functionality, especially after our previous release that introduced multiple long-awaited features such as support for Jupyter and Remote Development, respectively. Here is a summary of what’s new in PyCharm 2022.1. Download PyCharm 2022.1 IDE Authentication support for custom package repositories Now you can configure basic HTTP authentication to access custom package repositories and manage dependencies via PyCharm without switching to the terminal for manual installation. Go to the Python Packages tool window, click on the gear icon, click the plus sign in the dialog window, add the repository URL, and then select the Basic HTTP option to enter the required credentials. The new repository will appear on the list of packages in the left-hand side window. Code insight Enhanced code completion for TypedDict Dict literals can be used as arguments for functions or to instantiate objects from classes where TypedDict is expected. Doing so became even easier in PyCharm 2022.1 thanks to its new code completion for keys. Improved TypedDict per-key warnings We also improved the warnings for TypedDict. Now, when a dictionary created as a literal or by using the dict constructor is used where TypedDict is expected, PyCharm will display per-key error messages pointing to the individual values that are wrong, missing, or not expected. Improved Markdown support Run commands from Markdown files You often find instructions with commands to execute when working with Markdown files, such as in README files, for example. Now you can just run those commands directly from the file itself, by using the run icon in the gutter. Copy code snippet for Markdown Copying and pasting code snippets from Markdown files is also very common, and now you can use the new Copy code snippet to do this, available in Markdown blocks. Jupyter Support [Pro] Code cells remain in Edit mode after execution In order to make working with Jupyter notebooks a more fluid experience, new cells inserted after you Run Cell and Insert Below now default to Edit mode, so you can start writing code in it right away. The same behavior applies when you are editing and decide to run your current cell. It will remain in Edit mode even after being executed. Optimized cell copy-pasting To make your Jupyter experience more pleasant still, we changed the copy/cut and paste behavior for when you copy or cut a cell that has an output while in Command mode. Now, whenever you paste it back to your notebook, the output will also be pasted and you won’t need to execute the cell again. Databases [Pro] MongoDB: Editing fields in results In PyCharm 2022.1, editing the results in MongoDB collections or result sets obtained via .find() became as easy as it is in relational databases. This improvement also works when cursor methods that modify the result, such as sort() or limit(), are executed after .find(). Docker [Pro] New Services UI for Docker Working with Docker became easier and more organized in PyCharm 2022.1. We’ve significantly reworked the Docker UI in the Services tool window to give you much clearer control of your containers, images, networks, and volumes. These are all the features we wanted to highlight. Read about other features included in […]

Read More

Why Do Testers Need CI/CD?

Code Review News Competency in the TestOps field is now just as much of a basic requirement for QA engineers as the ability to write automated tests. This is because of the ongoing development of CI/CD and the increasing number of QA engineers who work with pipelines (or the sequence of stages in CI/CD) and implement their own. So why is CI/CD such a great tool for quality control? Let’s find out. Running tests automatically Automated tests haven’t been run locally in what feels like ages. These days, CI/CD pipelines run tests automatically as one of their main functions. Pipeline configuration can be assigned to DevOps. But then we will be a long way from making use of CI/CD’s second function: quality control, or more precisely, “quality gates”. Quality control using quality gates But what are quality gates? Let’s say the product code is like a castle. Every day, developers write new code – which could weaken the foundations of our castle or even poke holes in it, if we are really unlucky. The purpose of a QA engineer is to test each feature and reduce the likelihood of bugs finding their way into product code. Lack of automation in the QA process could cause QA engineers to lose sleep, since there is nobody to watch over all the various metrics – especially at dangerous times, like Friday evenings when everyone wants to leave work and is hurrying to get everything finished. An ill-fated merge at that moment can cause a lot of problems down the road. This problem can be solved by building in quality checks. Each check deals with a different important metric. If the code doesn’t pass a check, the gates close and the feature is not allowed to enter. A feature will only be merged into the product when it passes all the checks and potential bugs have been prevented. What quality checks can be included in CI/CD? We need to put together a list of checks to ensure that the process is as automated as possible. They can be sequenced in “fail first” order. A feature needs to pass all the checks to get through the pipeline successfully. The initial checks are the ones that make sure the app is capable of working: build, code style check, and static analysis.  “Build” speaks for itself: if the app cannot be built, the feature does not progress. It is important to incorporate a code style check into your CI/CD pipeline to ensure the code meets unified requirements, as doing so allows you to avoid wasting time on this kind of bug during code reviews. Static analysis is an extremely important tool for judging code quality. It can point out a huge number of critical errors that lead to bugs. We then continue with stage-two checks: unit tests with coverage analysis and coverage quality control, as well as integration and systems tests. Next, we review detailed reports of the results to make sure nothing was missed. At this stage we may also perform a range of non-functional tests to check performance, convenience, and security, as well as screenshot tests.  When developing a pipeline, we need to pay attention to two competing requirements:  The pipeline must guarantee the best possible feature quality in light of your needs. Time spent running […]

Read More

CLion 2022.1: A Quality-Focused Release

News Releases CLion 2022.1 is now available! It is focused on quality improvements and enhancements for existing features and workflows like remote development, Docker, CMake Presets integration, and more. It also brings a brand-new CMake Profiling ability that helps you visually inspect why your CMake project may be taking a long time to reload. Code analysis and in-editor type and parameter hints have been tuned to work better and more accurately with modern C++. To update to the new version, you can use the Toolbox App or a snap package (on Ubuntu), download the installer from our website, or apply the patch update to upgrade from version 2021.3. DOWNLOAD CLION 2022.1 Enhanced in-editor experience For this release we’ve polished many CLion features that make your coding experience more comfortable, easy, and productive. We focused on their flexibility and accuracy regarding the modern C++ language. Inlay hints Parameter and type hints help you read and maintain your existing codebases with ease. The extra information is shown right in the editor and helps with parameter names in function calls and deduced types. We’ve implemented a number of fixes to make inlay hints in C++ code more accurate, for example: CLion now displays a user-friendly wstring alias as a type hint for the std::basic_string type. CLion now displays an accurate type hint for dependent types. CLion 2022.1 offers better hints for the emplace, emplace_back/emplace_front, and make_unique/make_shared functions. In CLion 2022.1 we’ve enhanced the settings in Settings/Preferences | Editor | Inlay Hints with some explanations and code examples. You can now better understand the cases where the hints are shown and tune the settings to your preferences. Hints for array indices can now be disabled if you don’t need them. Previously this was not possible. Code analysis Because code analysis is a key part of the IDE, we’ve been working to make it more accurate and easier to configure, and to make its notifications more informative. The Clang-Tidy and MISRA settings in Settings/Preferences | Editor | Inspections | C/C++ | Static Analysis Tools were reworked to make the process of configuring checks easier. A new visual representation includes a tree with all of the checks. Speed search helps you find the checks you need faster – just start typing the name you are looking for when the dialog is in focus. For Clang-Tidy, the dialog also links to LLVM documentation to help you learn about the checks in more detail. It’s much easier to improve your code when the suggestions from the IDE not only name the problem and suggest the fix, but also show how the selected fix will transform the code. That’s why we’ve added a preview for intention actions: For Clang-Tidy, the issue causing incorrect results to occur when the WSL toolchain was used has been fixed by setting Clang-Tidy to execute inside the WSL itself. New C++ Class dialog When creating a new C++ class, you can now specify the namespace where you’d like the new class to be located. You’ll find a new field dedicated to this in the dialog: Structure View helps you navigate through the current file in just a few clicks. Sometimes you want the elements there to go in the same order as in the original file, but sometimes you want them to be grouped […]

Read More

PhpStorm 2022.1 is now available

Newsletter Releases This new major PhpStorm release includes improved Blade and Twig support, added functionality to docblock type annotations and attributes, a bunch of new and useful inspections, several improvements to the editor, and more. You can download PhpStorm 2022.1 here and read through this post to learn about all the new features and improvements inside. Let’s dive in! What’s new? Frameworks and languages PHP Static analysis IDE Improvements for Blade templates Previously, PhpStorm treated every code block in Blade templates as an independent scope. It caused many issues, such as losing code completion: In PhpStorm 2022.1, we’ve significantly reworked how the IDE handles Blade templates. As the result, you’ll get much better code completion in your Blade files: Namespace imports with autocompletion You can now also import namespaces in your blade files, instead of always having to use FQCNs: Many other issues with code completion and formatting in Blade templates were resolved as well, including: WI-37741 AutoCompletion of PHP Variables in Blade WI-64460 Blade: missing completion for methods inside tags if there is php block () WI-64463 Blade: two consecutive @php fragments are merged together and produce “expected: expression” warning WI-31196 Blade: wrong formatting with HTML comments WI-28285 Blade doesn’t indent nested statements when formatting WI-25667 Blade: formatting blocks are not aligning if there is a HTML comment after a closing tag WI-40358 Blade: @section inside @if block throws “Directive is not closed” WI-64594 Blade: support @js directive WI-65562 Blade: support @checked, @disabled, @selected, @prependonce, @pushonce directives You can see the full list of fixed issues in our issue tracker. We plan to continue improving our Blade template engine support. Improvements for Twig templates Just like Blade, we have also been improving our Twig support. Some users prefer their Twig tags not to be closed automatically after typing {%. This behavior is now configurable under Preferences | Editor | General | Smart Keys | Twig. Opening and closing tags will be also edited simultaneously now when you update them from {% to {{ or vice versa. Improvements for WordPress Jump from hook invocation to registrations The WordPress hook system is powerful, but it relies on the string names of events (actions). Because of that, it was not possible to jump straight from where a hook is called to where the handler is declared. In PhpStorm 2022.1, there is a gutter icon on the left of invocation. Click it to see the list of hook usages, including the registration and other invocations. Support for dynamic paths with get_template_directory_uri() In PhpStorm, you can use ⌘+Click (Ctrl+Click) on file paths to open the corresponding files in the editor. Previously, this behavior didn’t work for dynamic paths in WordPress code when the path was compounded using WordPress functions. In this release, we are adding support for get_template_directory_uri() function in paths. Extract Method refactoring has been available in PhpStorm since 2011. It is one of the most used refactorings. We’ve already made quite a few improvements for it in PhpStorm 2021.3. To use this refactoring, you can select a piece of code and press ⌘⌥M (Cmd+Alt+M / Ctrl+Alt+M). Previously, this would open a dialog for refactoring configuration. No one likes pop-ups, though, so in PhpStorm 2022.1, an in-place refactoring will be available instead in many cases where a method is being extracted. There won’t […]

Read More