
Learn how to Sort, Filter, and Group Data with JavaScript and the Ext JS Grid

A much-used term, Data Manipulation is the process of querying modifying data. It refers to the technique of adjusting data to make it more organized and easier to read. While many consider data manipulation difficult and complex, it does not need to be. With the Ext JS Grid, you can easily group, sort, and filter data using JavaScript. In this tutorial, you will find all the details.
What is the Ext JS Grid?
The “Grid” is one of the centerpieces of Sencha Ext JS. With it, you can easily fetch, sort, and filter a large amount of data. To make this possible, the Ext JS grid consists of two main components – an Ext Data Store full of data and a set of columns to render.
How to Group Data with the Ext JS Grid
Sorting Data in Multiple Columns
Let’s say that you are building a flight booking web application. As a part of the app, you want your users to be able to sort multiple columns including Date, Airline, and Schedule, to help them find the best flights. Take a look at the illustration below:

To implement the sort functionality to your web app using Ext JS, simply add the following code:
Ext.define('MyApp.view.Main', {
extend: 'Ext.grid.Grid',
title: 'Reykjavik Flight Departures',
multiColumnSort: true,
store: {
// Two property sort via store configuration
sorters: [{
property: 'airline'
}, {
property: 'destination'
}],
type: 'store',
autoLoad: true,
fields: [{name: 'date',type: 'date',dateFormat: 'j. M'}],
proxy: {type: 'ajax',url: 'departures.json',reader: {rootProperty: 'results'}}
},
columns: [{
xtype: 'datecolumn',
text: 'Date',
dataIndex: 'date',
format: 'M j',
width: 60
}, {
xtype: 'column', // This is the default column xtype
text: 'Airline',
dataIndex: 'airline'
}, {
text: 'To',
dataIndex: 'to'
}, {
text: 'Scheduled',
dataIndex: 'plannedDeparture',
align: 'center'
}, {
text: 'Status',
dataIndex: 'realDeparture',
flex: 1
}],
});
Ext.application({
name: 'MyApp',
mainView: 'MyApp.view.Main'
});
Once you understand the basics, you can experiment with the code using Sencha Fiddle.
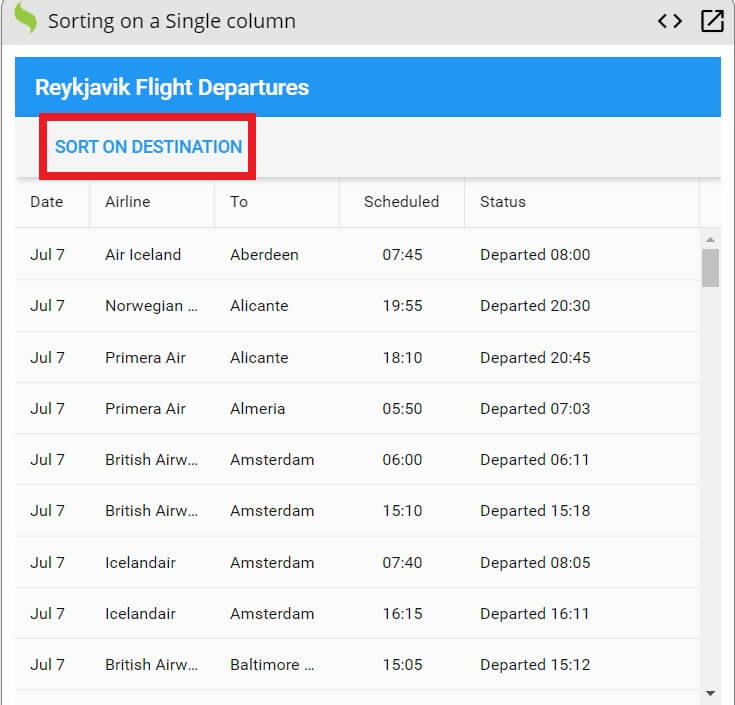
How can I sort Data in a Single Column?
Now that you have the multiple column sort down pat, let’s look at another use case. Say that you want your users to find their flights by clicking the SORT ON DESTINATION text and sort the destination data into just a single column:
To do it, you have to use the following code:
Ext.define('MyApp.view.Main', {
extend: 'Ext.grid.Grid',
title: 'Reykjavik Flight Departures',
items: [{
docked: 'top',
xtype: 'toolbar',
items: [{
text: 'Sort on destination',
handler: function(button){
// Sort under program control
button.up('grid').getStore().sort('to');
}
}]
}],
store: {
// Sort via store configuration
sorters: [{
property: 'airline'
}],
type: 'store',
autoLoad: true,
fields: [{name: 'date',type: 'date',dateFormat: 'j. M'}],
proxy: {type: 'ajax',url: 'departures.json',reader: {rootProperty: 'results'}}
},
columns: [{
xtype: 'datecolumn',
text: 'Date',
dataIndex: 'date',
format: 'M j',
width: 60
}, {
xtype: 'column', // This is the default column xtype
text: 'Airline',
dataIndex: 'airline'
}, {
text: 'To',
dataIndex: 'to'
}, {
text: 'Scheduled',
dataIndex: 'plannedDeparture',
align: 'center'
}, {
text: 'Status',
dataIndex: 'realDeparture',
flex: 1
}],
});
Ext.application({
name: 'MyApp',
mainView: 'MyApp.view.Main'
});
As you can see, the trick here is adding an event handler to the SORT ON DESTINATION text in addition to adding the Date, Airline and To columns.
Here is the link to Sencha Fiddle so you can experiment some more.
How can I Filter Data with an Ext JS Grid?
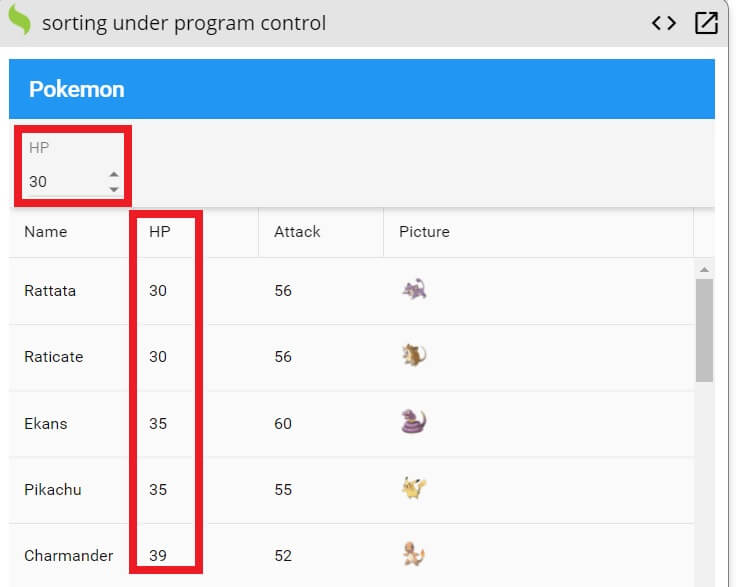
Sorting Data under Program Control
Let’s say that you have a table for Pokemon where the users can sort the data by adjusting the numerical value of the HP column:
You can use the following code snippet to implement this functionality:
Ext.define('MyApp.view.Main', {
extend: 'Ext.grid.Grid',
title: 'Pokemon',
onHpChange: function(field, value) {
var store = this.getStore();
store.clearFilter();
store.filterBy(function(r1) {
return r1.data.hp >= value;
});
},
items: [{
xtype: 'toolbar',
docked: 'top',
items: [{
xtype: 'spinnerfield',
minValue: 30,
maxValue: 100,
stepValue: 10,
value: 30,
width: 80,
labelWidth: 30,
label: 'HP',
listeners: {
change: 'up.onHpChange'
}
}]
}],
plugins: {
gridsummaryrow: true
},
store: {
sorters: ['hp'],
proxy: {
type: 'ajax',
url: 'inventory.json'
},
autoLoad: true
},
columns: [{
text: 'Name',
dataIndex: 'name',
summary: 'count',
summaryRenderer: function(grid, context) {
return (context.records.length + ' Pokemon');
}
}, {
text: 'HP',
dataIndex: 'hp'
}, {
text: 'Attack',
dataIndex: 'attack'
}, {
cell: {
encodeHtml: false,
tpl: '![]() ',
',
},
text: 'Picture',
dataIndex: 'pokedex',
flex: 1
}]
});
Ext.application({
name: 'MyApp',
mainView: 'MyApp.view.Main'
});
Please take a look at this portion of the code:
items: [{
xtype: 'spinnerfield',
minValue: 30,
maxValue: 100,
stepValue: 10,
value: 30,
width: 80,
labelWidth: 30,
label: 'HP',
listeners: {
change: 'up.onHpChange'
}
In the example, you are specifying the different properties of the HP column, which includes minimum value, maximum value, and step value.
If you want to see more, you can play with the code at Sencha Fiddle.
Sorting Data Using Filter Binding
Another way you can implement the functionality shown in the previous section is by utilizing filter binding. To do this simply enter the following:
Ext.define('MyApp.view.MainModel', {
extend: 'Ext.app.ViewModel',
alias: 'viewmodel.main',
data: {
value: 30
},
stores: {
pokemon: {
// This is pretty obscure. :-p
filters: [{
// This is a binding: it triggers running setFilters() * and * the property is available in filterFn.
val: '{value}',
id: 1, // A constant will reuse this filter rather than adding a new one
filterFn: function(pokemon) {
console.log(pokemon.data.hp);
return (pokemon.data.hp >= this.val);
}
}],
sorters: ['hp'],
model: 'Ext.data.Model',
proxy: {
type: 'ajax',
url: 'inventory.json'
},
autoLoad: true
}
}
});
Ext.define('MyApp.view.Main', {
extend: 'Ext.Panel',
viewModel: {
type: 'main'
},
title: 'Pokemon',
tbar: [{
xtype: 'spinnerfield',
minValue: 30,
maxValue: 100,
stepValue: 10,
width: 110,
labelWidth: 30,
label: 'HP',
bind: {
value: '{value}'
}
}],
layout: 'fit',
items: [{
xtype: 'grid',
bind: {
store: '{pokemon}'
},
plugins: [{
type: 'gridsummaryrow'
}],
columns: [{
text: 'Name',
dataIndex: 'name',
summary: 'count',
summaryRenderer: function(grid, context) {
return (context.records.length + ' Pokemon');
}
}, {
text: 'HP',
dataIndex: 'hp'
}, {
text: 'Attack',
dataIndex: 'attack'
}, {
cell: {
encodeHtml: false,
tpl: '![]() ',
',
},
text: 'Picture',
dataIndex: 'pokedex',
flex: 1
}]
}]
});
Ext.application({
name: 'MyApp',
mainView: 'MyApp.view.Main'
});
If you are using this method, take note of the following:
filters: [{
// This is a binding: it triggers running setFilters() * and * the property is available in filterFn.
val: '{value}',
id: 1, // A constant will reuse this filter rather than adding a new one
filterFn: function(pokemon) {
console.log(pokemon.data.hp);
return (pokemon.data.hp >= this.val);
}
}],
Here, you are binding the filters property to val: '{value}'. In this way, changing the specific property will automatically trigger the function of filterFn.
Download the source code at Sencha Fiddle.
How can I Group Data with a Javascript Ext JS Grid?
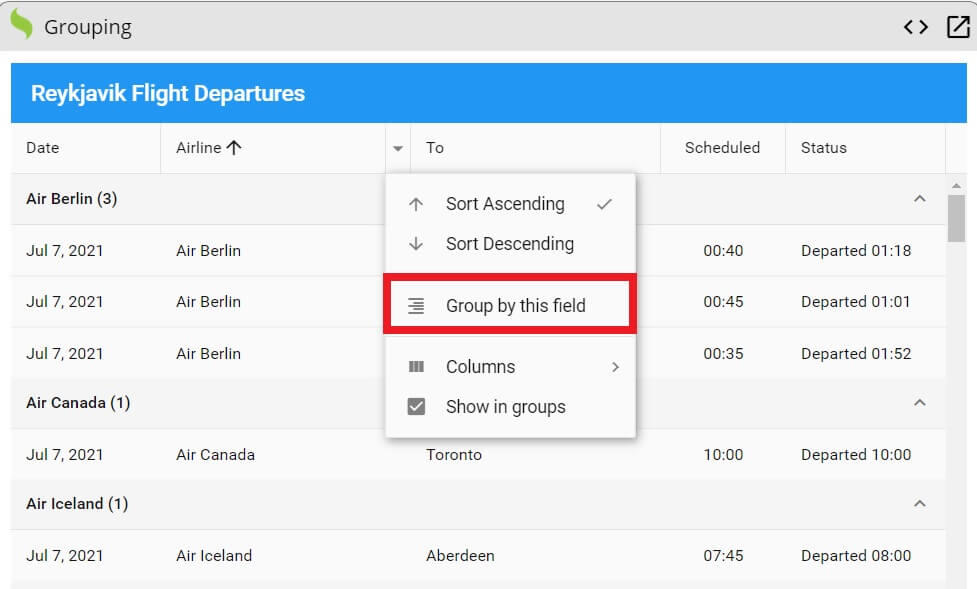
Group Data by a Specific Field
Now, let’s say that you want to let your users group flight data by a specific field, like Airline:
To implement this functionality, you to add this code to your web application:
Ext.define('MyApp.view.Main', {
extend: 'Ext.grid.Grid',
title: 'Reykjavik Flight Departures',
grouped: true,
columns: [{
xtype: 'datecolumn',
text: 'Date',
dataIndex: 'date',
format: 'M j, Y',
width: 120
}, {
xtype: 'column', // This is the default column xtype
text: 'Airline',
dataIndex: 'airline',
width: 200
}, {
text: 'To',
dataIndex: 'to',
width: 200
}, {
text: 'Scheduled',
dataIndex: 'plannedDeparture',
align: 'center'
}, {
text: 'Status',
dataIndex: 'realDeparture',
flex: 1
}],
store: {
type: 'store',
autoLoad: true,
fields: [{name: 'date',type: 'date',dateFormat: 'j. M'}],
proxy: {type: 'ajax',url: 'departures.json',reader: {rootProperty: 'results'}}
}
});
Ext.application({
name: 'MyApp',
mainView: 'MyApp.view.Main'
});
IMPORTANT: Make sure that grouped is set to true.
To see it in action, here is the link to Sencha Fiddle.
Bonus: How can I Manipulate Data Using Plugins with Ext JS Grid?
With the Ext JS Grid Plugins, you can add amazing functionality that helps your users manipulate data easily and conveniently. As an example, we will discuss two plugins:
- Row Operations
- Row Drag and Drop
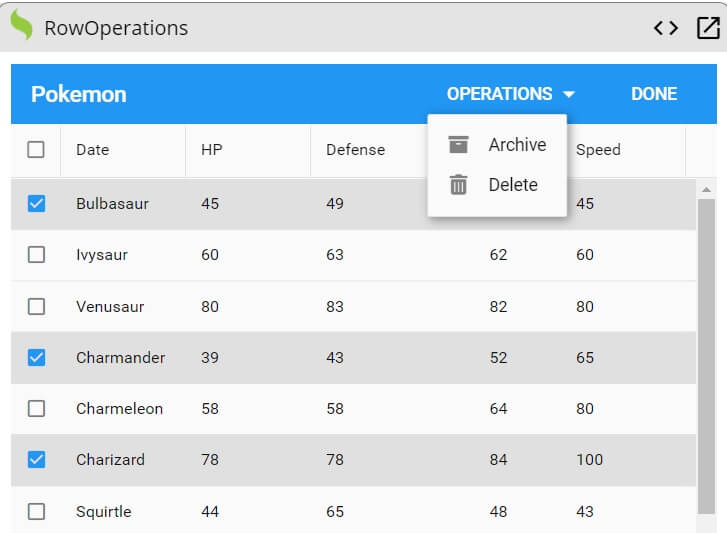
Row Operations
With the row operations plugin, you can set up an operation to be performed on a specific row. Here is an example of selecting and deleting rows with a single operation:
To create this functionality with the Row Operations plugin, you have to add this code:
Ext.define('MyApp.view.main.MainController', {
extend: 'Ext.app.ViewController',
alias: 'controller.main',
onArchive: function() {
var grid = this.getView();
var records = grid.getSelections();
var names = Ext.Array.pluck(Ext.Array.pluck(records, 'data'), 'name');
Ext.Msg.alert('Archive', 'Archive ' + names.join(', ') + '?');
},
onDelete: function() {
var grid = this.getView();
var records = grid.getSelections();
var names = Ext.Array.pluck(Ext.Array.pluck(records, 'data'), 'name');
Ext.Msg.confirm('Delete', 'Delete ' + names.join(', ') + '?',
function(buttonId) {
if (buttonId === 'yes') {
grid.getStore().remove(records);
}
});
}
});
Ext.define('MyApp.view.Main', {
extend: 'Ext.grid.Grid',
controller: 'main',
title: 'Pokemon',
plugins: {
rowoperations: {
// This config replaces the default "Delete" button provided by the plugin.
operation: {
text: 'Operations',
ui: 'alt',
menu: [{
text: 'Archive',
iconCls: 'x-fa fa-archive',
handler: 'onArchive'
}, {
text: 'Delete',
iconCls: 'x-fa fa-trash',
handler: 'onDelete'
}]
}
}
},
columns: [{
text: 'Date',
dataIndex: 'name'
}, {
text: 'HP',
dataIndex: 'hp',
}, {
text: 'Defense',
dataIndex: 'defense'
}, {
text: 'Attack',
dataIndex: 'attack',
align: 'center'
}, {
text: 'Speed',
dataIndex: 'speed'
}],
store: {
type: 'store',
autoLoad: true,
proxy: {
type: 'ajax',
url: 'inventory.json'
}
}
});
Ext.application({
name: 'MyApp',
mainView: 'MyApp.view.Main'
});
Keep in mind that you are adding delete and archive functionality with this code:
operation: {
text: 'Operations',
ui: 'alt',
menu: [{
text: 'Archive',
iconCls: 'x-fa fa-archive',
handler: 'onArchive'
}, {
text: 'Delete',
iconCls: 'x-fa fa-trash',
handler: 'onDelete'
}]
}
Here is the link to the source code.
How can I Drag and Drop a row in JavaScript?
As the name suggests, the plugin allows you to drag and drop the rows of the table easily, just like this:
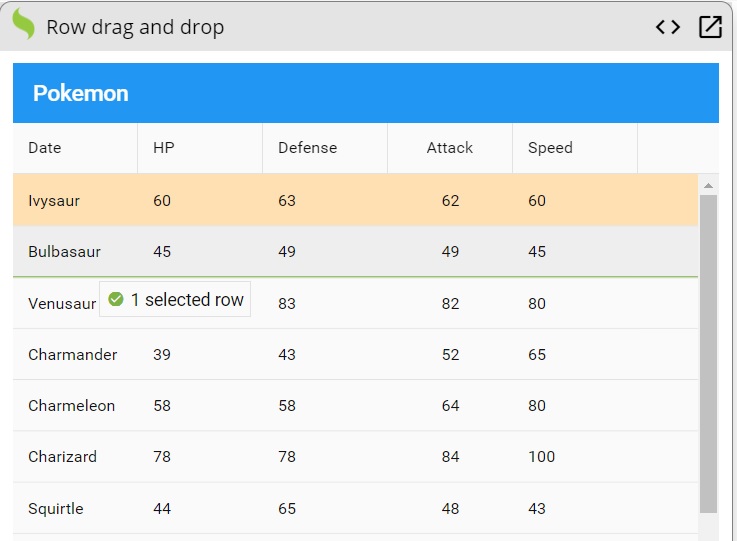
To implement drag and drop functionality use the following:
Ext.define('MyApp.view.Main', {
extend: 'Ext.grid.Grid',
title: 'Pokemon',
plugins: {
gridrowdragdrop: {}
},
columns: [{
text: 'Date',
dataIndex: 'name'
}, {
text: 'HP',
dataIndex: 'hp',
}, {
text: 'Defense',
dataIndex: 'defense'
}, {
text: 'Attack',
dataIndex: 'attack',
align: 'center'
}, {
text: 'Speed',
dataIndex: 'speed'
}],
store: {
type: 'store',
autoLoad: true,
proxy: {
type: 'ajax',
url: 'inventory.json'
}
}
});
Ext.application({
name: 'MyApp',
mainView: 'MyApp.view.Main'
});
The following code adds row drag and drop functionality:
plugins: {
gridrowdragdrop: {}
}
Wrapping Up
That’s it! You have learned some of the different ways you can manipulate data with JavaScript in Sencha Ext JS. Using the Ext JS Grid, you can sort, filter, and group data easily. Also, by utilizing the Grid Plugins, you can add even more data manipulation functions to your Sencha Ext JS web application.
Sencha ExtJS is a powerful JavaScript framework for building data-intensive web applications for any modern device. Try it now for free to build cross-platform web apps.
Check out Sencha Ext JS today to build and display powerful interactive data grids!


