
How Can Computer Vision Help You Stay Ahead Of The Competition?

Who loves AI algorithms? The Read service is an API that identifies any visible text, printed and handwritten on images or PDF files. The API returns the words on results with confidence percentual of that text found on the image/PDF. Using it, you can extract any texts from images/PDF even if someone wrote by hand. If is there any word, it can identify. Now let’s create our Javascript Ext JS application using best practices and applying this awesome API to scan images to extract texts from it. Incorporating computer vision into your Javascript applications like this can really help you stay ahead of the competition.
Let’s get started!
Prerequisites
Before you start, there are some prerequisites to follow to access the API. You can follow the steps here to create a Computer Vision resource on Microsoft Azure to get your keys to access the API.
Starting with Sencha CMD
If you still don’t have Sencha CMD, you can download it for free here.
Once you have it installed make sure it was installed and configured properly, running this command on terminal/shell:
If it returns sencha cmd version, you are good to go. Here are more details on how to install, configure and use Sencha CMD, but this article will show all the important details.
Creating the application
The first thing you want to do is create your project structure and Sencha CMD can do it for you easily, just by running this command:
sencha -sdk /Users/fabio/sencha-sdks/ext-7.3.1/ generate app modern ReadTextImage ./read-text-image-extjs
/Users/fabio/sencha-sdks/ext-7.3.1/is where your Ext JS SDK folder is.- ReadTextImage is the name of our application that will be our namespace for our classes.
./read-text-image-extjsis the path where it will create our project structure with the needed files.- modern is the toolkit selected for our application.
Make sure when you run this command there is no error on the output. If everything was running correctly, it created your project structure. Let’s run our application with the initial structure. First navigate to your project folder:
$ cd read-text-image-extjs/
Then, run the command that will up the server on a specific port:
The output of this command will show you the URL where your app will be available. For our case, it is available on http://localhost:1841/. Open it on your browser and you will see a screen like this: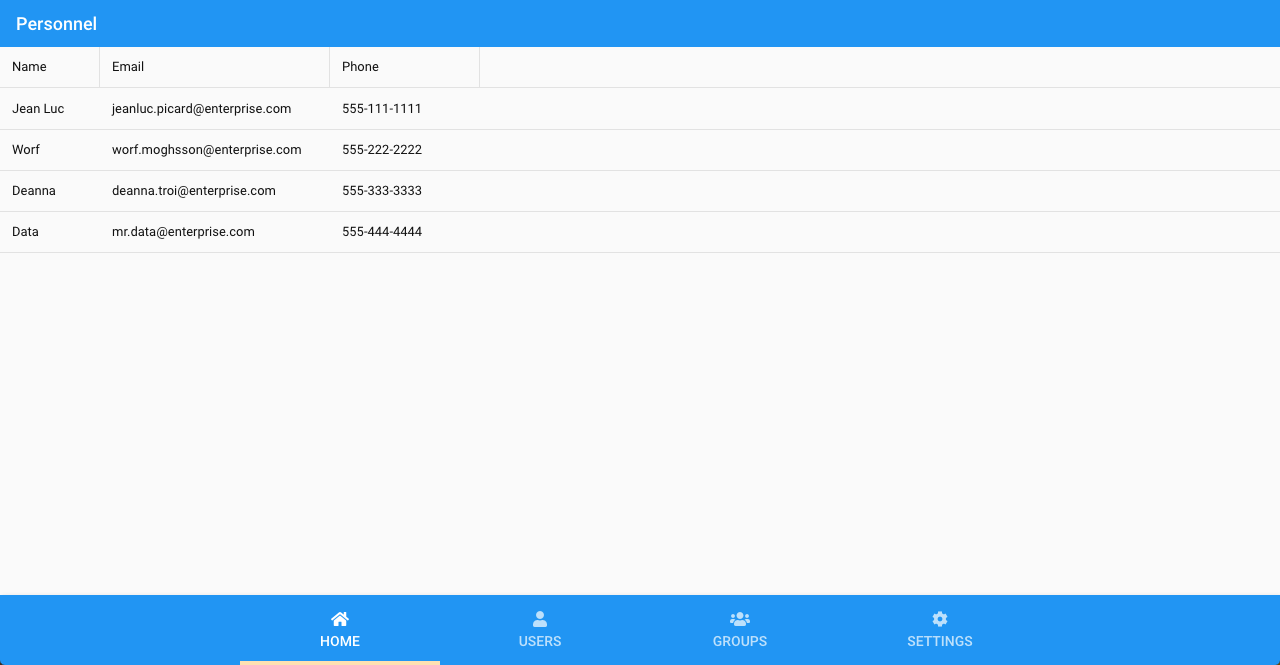
Cleaning up
Once we have our basic project running, we can remove from it the files and components that will not use.
You can delete these files with the command bellow (open other terminal and keep sencha app running because it will update the application automatically):
$ rm app/model/* app/store/* app/view/main/List.*
Now let’s clean up our classes that are on app/view/main. Make sure your three classes are like this:
Main.js:
/**
 * This class is the main view for the application. It is specified in app.js as the
 * "mainView" property. That setting causes an instance of this class to be created and
 * added to the Viewport container.
 */
Ext.define('ReadTextImage.view.main.Main', {
    extend: 'Ext.Panel',
    xtype: 'app-main',
    controller: 'main',
    viewModel: 'main'
});
MainController.js:
/**
 * This class is the controller for the main view for the application. It is specified as
 * the "controller" of the Main view class.
 */
Ext.define('ReadTextImage.view.main.MainController', {
    extend: 'Ext.app.ViewController',
    alias: 'controller.main'
});
MainModel.js:
/**
 * This class is the view model for the Main view of the application.
 */
Ext.define('ReadTextImage.view.main.MainModel', {
    extend: 'Ext.app.ViewModel',
    alias: 'viewmodel.main',
    data: {}
});
After that, make sure your app is running perfectly without errors on the browser console. It will show only a panel without content for now.
Creating our Main View
Let’s start creating a container with components form with the fields to user fill with API information and URL for the image to be scan, including a preview for the image and also a grid to show the results.
It’s very important to observe that all possible components we can bind, we are doing, linking with the View Model data that we will implement on the next. Also, we have a single event on our button that is calling our method that we will create on our ViewController.
Here is the full code of our view, very simple and complete:
Ext.define('ReadTextImage.view.main.Main', {
    extend: 'Ext.Container',
    xtype: 'app-main',
    controller: 'main',
    viewModel: 'main',
    layout: {
        type: 'hbox',
        align: 'stretch'
    },
    items: [{
        xtype: 'formpanel',
        reference: 'form',
        width: 500,
        defaultType: 'textfield',
        items: [{
            label: 'Endpoint (replace with your endpoint)',
            bind: '{endPoint}'
        },{
            label: 'Subs. Key',
            bind: '{key}'
        },{
            xtype: 'displayfield',
            label: 'API',
            bind: '{api}'
        },{
            label: 'File URL',
            bind: '{fileUrl}'
        },{
            // TODO: Implement preview for PDF
            xtype: 'image',
            height: 300,
            bind: {
                src: '{fileUrl}'
            }
        }],
        bbar: ['->', {
            text: 'Run',
            handler: 'onRunHandler'
        }]
    },{
        xtype: 'grid',
        flex: 1,
        title: 'Lines found',
        variableHeights: true,
        itemConfig: {
            collapsed: false,
            body: {
                tpl:
                    `Words:


                            {text} - confidence: {confidence * 100}%

                    `
            }
        },
        bind: '{lines}',
        columns: [{
            text: 'Line',
            dataIndex: 'text',
            flex: 1
        }]
    }]
});
Defining our Data on ViewModel
Now let’s define some data and a store connected with our view. With the store lines we will be able to save our final response that comes from the API to show in a table format:
Ext.define('ReadTextImage.view.main.MainModel', {
    extend: 'Ext.app.ViewModel',
    alias: 'viewmodel.main',
    data: {
        endPoint: 'https://fabio-test.cognitiveservices.azure.com', // replace with your endpoint
        api: 'vision/v3.2/read/analyze',
        key: 'yourKeyHere',
        fileUrl: 'https://upload.wikimedia.org/wikipedia/commons/thumb/a/af/Atomist_quote_from_Democritus.png/338px-Atomist_quote_from_Democritus.png'
    },
    stores: {
        lines: {
            fields: ['text', 'words']
        }
    }
});
Understanding the Logic for the Calls
Our MainController has the most important code, where we call the API. This API must be called in two steps:
The first will inform what file it should process and the second will check if the file was processed and is ready. We will have to repeat this second call because sometimes, depending on the size and complexity of the file, the API needs more time to scan. For each request, the API will return the status of the operation and as soon we receive the status succeeded we will know that is ready to show the result and stop calling it.
Implementing the Logic on our ViewController
Firstly, we define the method onRunHandler what is the one called when the user clicks on the button Run defined on the MainView. On it, we put a mask while our operation is processing, we call the first request for the API, including our key as a credential to access the API, and when we have the success callback on the first API call will call the second request defined on our getReadResult method:
onRunHandler() {
    const {
        endPoint,
        api,
        key,
        fileUrl
    } = this.getViewModel().getData();

    this.lookup('form').mask('Running...');

    Ext.Ajax.request({
        url: `${endPoint}/${api}`,
        headers: {
            'Ocp-Apim-Subscription-Key': key // authentication
        },
        jsonData: {
            url: fileUrl
        },
        success: response => {
            this.getReadResult(response.getResponseHeader('Operation-Location'), key);
        }
    });
}
The next step is to implement the method to make the second call for the API to check if the process is ready. Here we check the response if it has the status succeeded to remove the loading mask and insert the response data from the API to the store that will show the final result on our grid created on our MainView. If is not ready the own method will call itself again for each 1 second to verify the API has the final result:
getReadResult(url, key) {
    Ext.Ajax.request({
        url,
        headers: {
            'Ocp-Apim-Subscription-Key': key
        },
        success: response => {
            const result = Ext.decode(response.responseText);

            // if process is not ready
            if (result.status !== 'succeeded') {
                // try again after 1 sec
                Ext.defer(() => {
                    this.getReadResult(url, key);
                }, 1000);

                return;
            }

            this.lookup('form').unmask();

            // populate the store to show result words on grid
            // simplify only to read page 1(array position 0) for images.
            // TODO: in case of pdf, can be verified each page of the result
            this.getViewModel().getStore('lines').setData(result.analyzeResult.readResults[0].lines);
        }
    });
}
Here is the final MainController:
Ext.define('ReadTextImage.view.main.MainController', {
    extend: 'Ext.app.ViewController',
    alias: 'controller.main',

    onRunHandler() {
        const {
            endPoint,
            api,
            key,
            fileUrl
        } = this.getViewModel().getData();

        this.lookup('form').mask('Running...');

        Ext.Ajax.request({
            url: `${endPoint}/${api}`,
            headers: {
                'Ocp-Apim-Subscription-Key': key // authentication
            },
            jsonData: {
                url: fileUrl
            },
            success: response => {
                this.getReadResult(response.getResponseHeader('Operation-Location'), key);
            }
        });
    },

    getReadResult(url, key) {
        Ext.Ajax.request({
            url,
            headers: {
                'Ocp-Apim-Subscription-Key': key
            },
            success: response => {
                const result = Ext.decode(response.responseText);

                // if process is not ready
                if (result.status !== 'succeeded') {
                    // try again after 1 sec
                    Ext.defer(() => {
                        this.getReadResult(url, key);
                    }, 1000);

                    return;
                }

                this.lookup('form').unmask();

                // populate the store to show result words on grid
                // simplify only to read page 1(array position 0) for images.
                // TODO: in case of pdf, can be verified each page of the result
                this.getViewModel().getStore('lines').setData(result.analyzeResult.readResults[0].lines);
            }
        });
    }
});
Running the Application
After changes applied, access the app on http://localhost:1841/
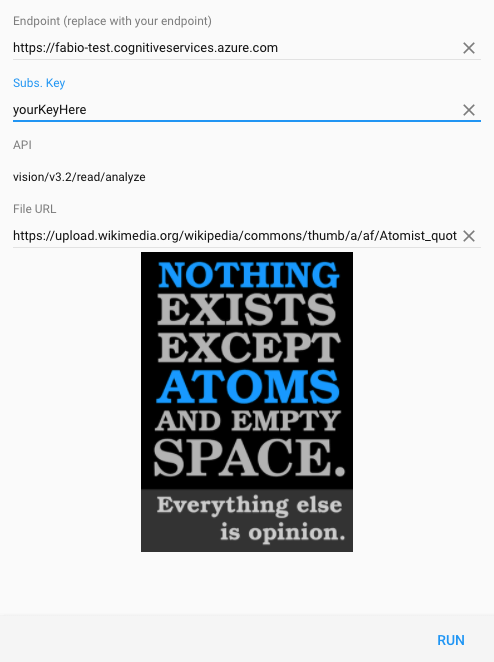
On the left side, you can see the form with the fields. Make sure to change the Endpoint URL with your URL created on Azure and also paste your Key on the proper field. There will be a preview with the image, if you change the image URL with any other image available on the web, it will show the preview instantly.
Once the form completely filled, click on the button Run:
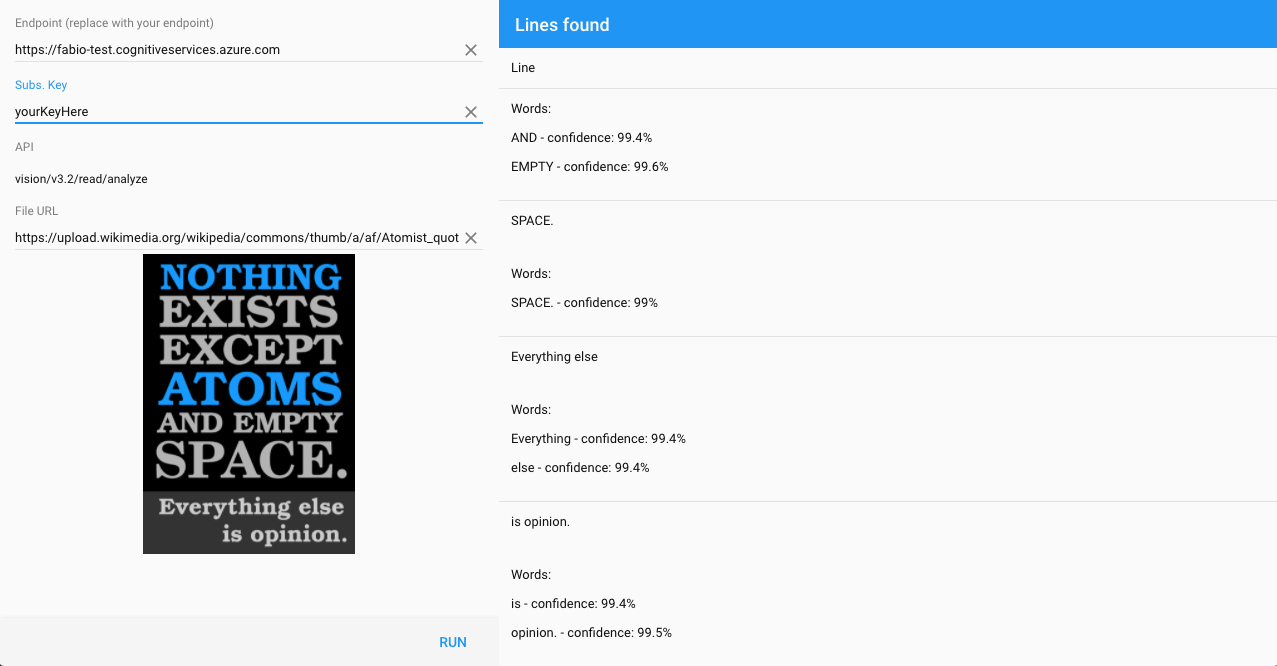
After some seconds you will see the result on the grid on the right side. Each row of the grid has a line found on the document and on the same row you will see more details about each word of that line with the respective confidence percentage:

Here is the final application:
What’s next?
Now you can implement the UI to preview a PDF and read all pages of the PDF identifying printed and handwritten words.
Click here to see the source code on the repository.


